


Thanks for stopping by the Stamping Station once again.
Blessings,
Julie


 Check out this glitter! It's the Silver Glass Glitter from the Holiday Mini Catalog which is available TOMORROW!!! The finish is supposed to tarnish a bit over time to give it a vintage look. It's also available in Champagne. Isn't it gorgeous????!!!!! Oh, and don't forget that fun sponged frame. The Vintage Frame stencil is 8 1/4 x 8 1/4, so it's large enough for your scrapbook pages and adjustable for your cards and smaller projects. I've also used the center frame and can't wait to show you how it looks. I sponged two different colors so that you could see how to step it up a notch.
 No, it's not Christmas yet, but I did need to play with my Holiday Mini Catalog pre-order. Isn't this DSP adorable? The SU! Polka Dot texturz plate was used on the background Wild Wasabi and the snowflakes were punched out of Pink Pirouette and Whisper White. The greeting is from Season's Greetings.
 As crazy as it sounds, it really is time for the Holiday Mini Catalog. Some of you have received them in the mail already. Just look at these beautiful embossed snowflakes! Aren't they gorgeous?! It's a new embossing folder in the Holiday Mini. I also daubed Shimmerz paint on the snowflakes, but you can't really see it in the photo. That's just something that you'll want to see in person because it's a beautiful shimmer. I stamped Serene Snowflakes in the background and attached a 1/8" Taffeta bow in the corner to finish it off. Whisper White and Marina Mist are the colors.
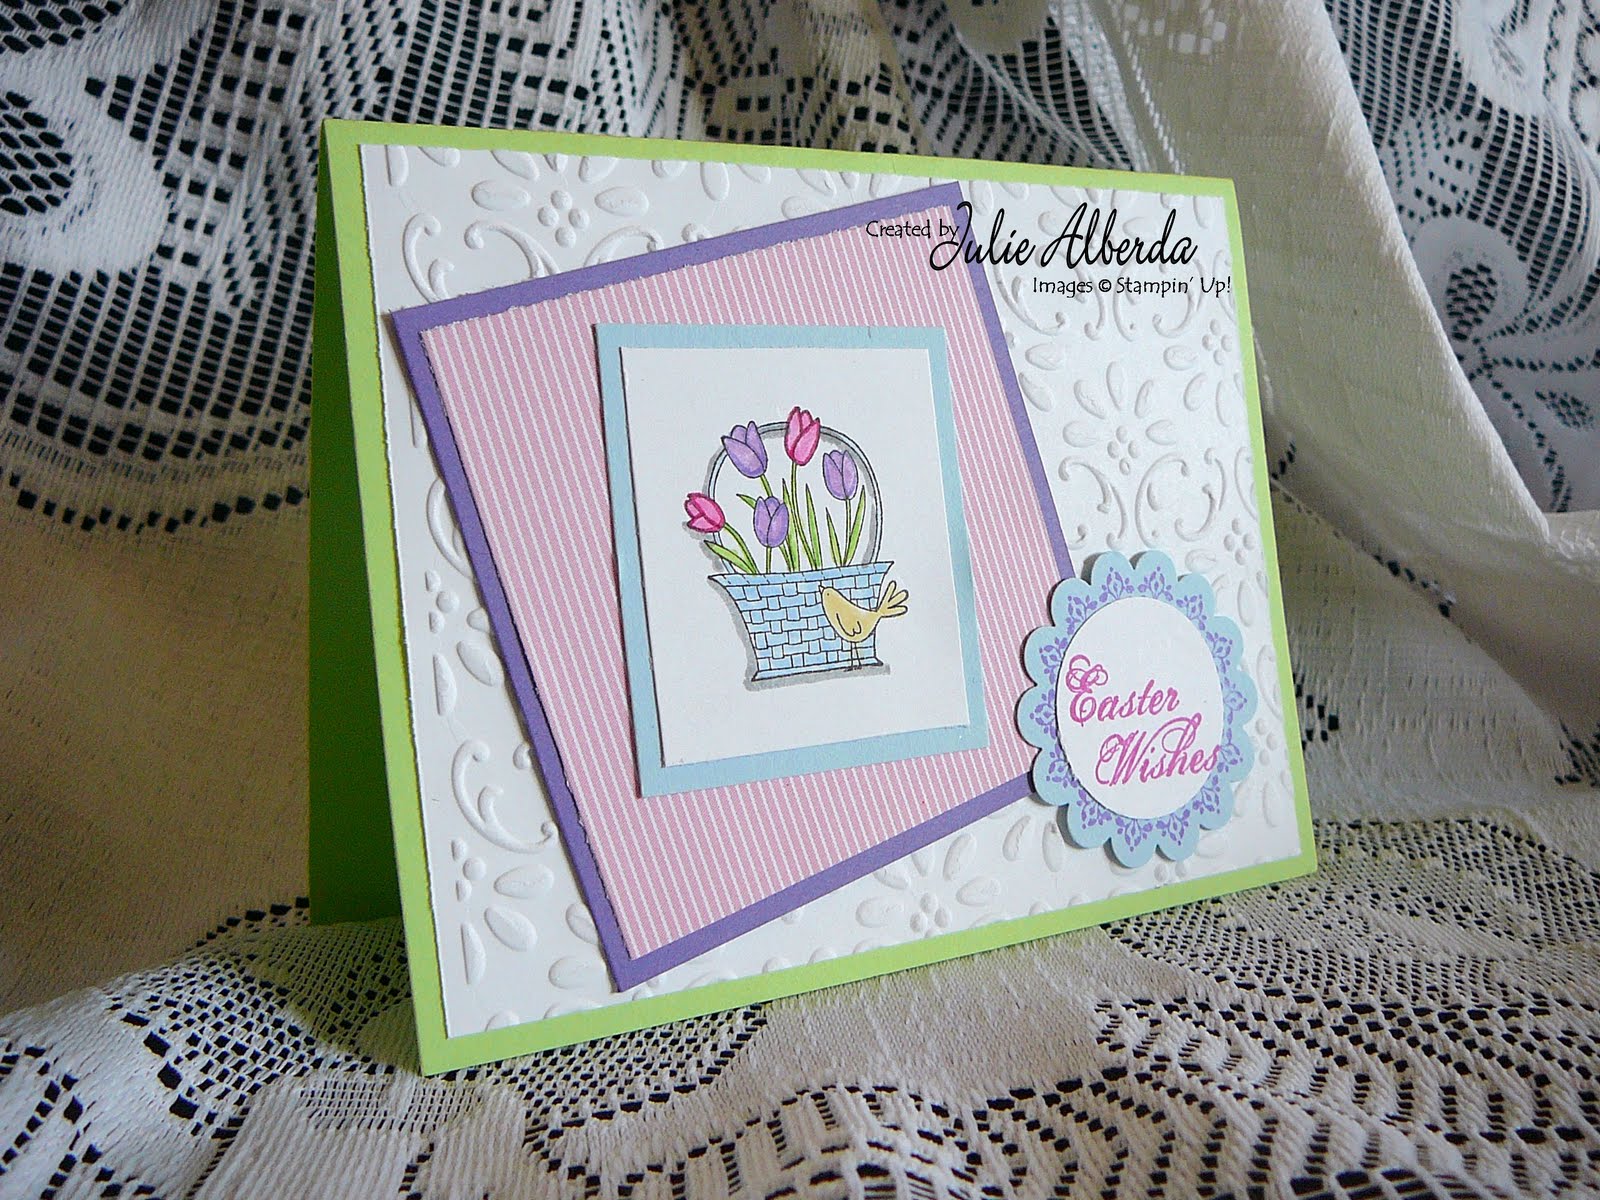 Oh yeah! See that great embossing pattern in the back- ground? That's the Finial Press embossing folder from Stampin' Up! This first card was from a workshop where the hostess requested an Easter card. The tulip basket image is from A Flower for All Seasons, a set that I received free as a Sale-A-Bration reward. I just love FREE!
 And here is the same card that we made at the next workshop with a ribbon added and switched into a birthday card. The DSP is from the Sale-A-Bration pack. The birthday greeting is from the new set Well Scripted...isn't it gorgeous?! I punched it out with my wide oval punch and the frame behind is was punched out with my Big Shot and Lots of Tags sizzlits. I just love how Stampin' Up! coordinates their accessories.
 The presents are different sized squares of designer paper from the Holiday Mini Catalog. The curly ribbon is very thin strips of Christmas Cocoa designer paper, curled around the applicator of the pastel chalks. The thin stitched ribbon is a slice of the Mistletoe Ribbon Originals from the Holiday Mini Catalog. The greeting is from All Holidays in the 2009-2010 Idea Book & Catalog.
 My blogging buddy Georgeann made this adorable card and I just had to CASE her. (Copy And Share Everything.) Georgeann has beautiful card ideas and you should see her watercoloring!
 Here are a couple more cards from last Saturday's workshop. I've been buying some special accessories and made a point to use some of them. This card uses Hidden Garden Rub-Ons, Kiwi/Vanilla Satin ribbon, Button Bouquet, Bella Rose Designer Paper, Riding Hood Red, Kiwi Kiss and Whisper White cardstock. The button has a bit of crochet thread tied through the center. The sentiment is from All Holidays and the flowers on the corners of the sentiment are from Eastern Blooms.
 This was one of my favorites from Saturday. We sponged Sahara Sand and Baja Breeze on Glossy White cardstock, then stamped the vase and pussy willows in Close to Cocoa. We stamped the vase again on a sheet of Parisian Breeze Designer Paper, cut it out and glued it on. The large white grommet is from the new Occasions Mini Catalog, which is also where you'll find this stamp set, Scene in a Garden. After punching a 1/2" circle in the Baja cardstock, you put the grommet prongs through the hole and bend them back with a bone folder. After gluing the Baja to the background Kraft cardstock, we stamped the little birdie on glossy, colored him in with a blender pen and Baja ink, then punched him out with the 1/2" circle and glued him inside the grommet. For the last touch, we used the White Gel Pen on the pussy willows. Very easy card, yet it looks more involved.
 Yesterday's Inspiration Challenge on SCS was to go to Flutter and choose something that inspires you. I chose a pearl globe necklace because of the background cloth that it was on. It reminded me of the shaving cream technique. The "globe" of pearls is a baggie with pearls from the Pretties Kit taped to the back of the glossy cardstock, after I punched out a 1 3/4" circle. The top of the necklace was created by punching the eyelet punch in brushed silver and then punched out with a 1" circle punch. The top is half of a 1/2" circle punch. The medalion for the saying was created by a scallop punch and using the corner rounder punch on the circle that was punched out of the shaving cream piece. I hope you like the card, because it sure was fun!